Necron Catacomb Command Barge and Immortals
A few years ago I was quite overweight. I decided to make a change for myself, and went about exercising and dieting to get back into a healthy state. On this quest for self improvement, I enlisted Macathu, who created a plan to whip me into shape. As a thank you, I surprised him with painted command barge, overlord, and full unit of gauss immortals. This is the story of that paintjob!
(Note: This post is a bit more freeform, since these photos were not organized or planned to be a post. They are merely the photos I sent back and forth with Shantz when discussing the paintjob)
(Note: This post is a bit more freeform, since these photos were not organized or planned to be a post. They are merely the photos I sent back and forth with Shantz when discussing the paintjob)
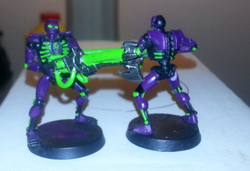
Here is a shot of Macathu's warriors. He decided on a purple/green/black scheme, as he wanted something that wasn't the bog standard boltgun silver.
I wanted to take this scheme and bump it up a notch, so he'd have a few showcase units on the table top. (Plus he's responsible for making me fit and an awesome guy, so he gets the best I can do!)
I wanted to take this scheme and bump it up a notch, so he'd have a few showcase units on the table top. (Plus he's responsible for making me fit and an awesome guy, so he gets the best I can do!)
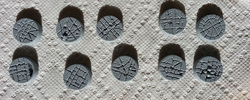
For the bases for the immortals, I decided to go with the desecrated land set from dragonforge.
I've been quite pleased with their bases on my other models, as not only is the resin really nice to work with (and detailed), but the extra heft helps keep the models in place.
I've been quite pleased with their bases on my other models, as not only is the resin really nice to work with (and detailed), but the extra heft helps keep the models in place.
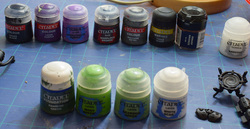
Purples
Liche purple, highlighted by hormagant purple.
Metals
Warplock bronze + boltgun drybrush + badab black for the default
Certain areas would then get a hit of dwarf bronze to add contrast.
Greens
Knarloc Green, Moot Green, Skarsnik, with white scar highlights and thrakka green wash.
Base
I went with codex and adminstratium grey, with the reds being a combination of merchite, red gore, and blazing orange.
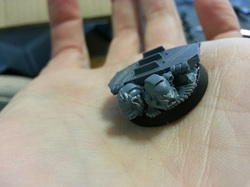
I forgot that the barge kit came with a necron lord (that kit is a wonderful deal!). This meant I was missing a base. Oh oh. I decided to make one out of misc parts I had laying around. I took some space marine heads and a rhino door, and glued them on your standard 28mm base. Came out pretty good!
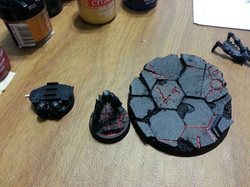
For some reason, I always like doing the bases before the models. Maybe it gives me a sense of progression that helps me work through the process. I'm not entirely sure. Either way, I love me some bases.
I was originally going to use the standard catacomb barge base...but it's awful...i mean really awful. You constantly see the poor things tipping over in battle reports. Since I was getting rid of one of my old dreadnoughts, I repurposed it's dragonforge base for the catacomb barge. It's quite thick and heavy, and makes an excellent support platform.
I watered down red paint, and allowed it to seep into the cracks and crevices, highlighting with red gore and blazing orange, until it looked in between blood and lava. I used some ard coat to give it a sheen to make it stand out a bit more as an glowy evil thing.

For the lords base, I cut and slashed the helmets as if hit by a warscythe, and painted them as my black templars. (Since he loves killing my marines). Just simple highlighting on the base otherwise.
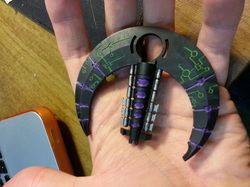
Primed everything else, and started working on the base coats for everything. I watered down the base coats of paints so they'd flow in the crevices, then quickly wiped off the upper surfaces with a paper towel.
Later I would go back, and use the highlight color, and do the same (only with a bit less water). I wasn't too concerned about the greens being highlighted, so much as them being bright and standing out.
Later I would go back, and use the highlight color, and do the same (only with a bit less water). I wasn't too concerned about the greens being highlighted, so much as them being bright and standing out.
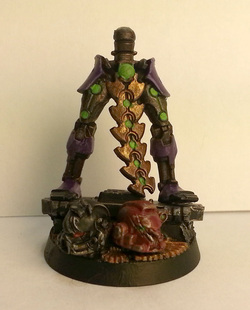
Skipped a few steps here. For the base necron metals, I put tin bitz (warplock bronze now) all over the place as the starting point. Then I dry brush with boltgun (leadbelcher), then a heavy wash of badab black.
I'll then go back and very lightly dry brush some boltgun back on. To pimp out the lord some, I used dwarf bronze on sections, and then badab black washed it to pull it back a bit.
This particular photo shows the bottom half of the lord almost done.
I'll then go back and very lightly dry brush some boltgun back on. To pimp out the lord some, I used dwarf bronze on sections, and then badab black washed it to pull it back a bit.
This particular photo shows the bottom half of the lord almost done.
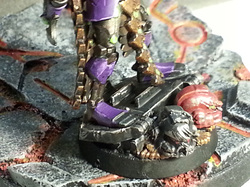
Another shot showing off the base. Good example of the drybrushing I was doing on the main bases as well. You can see some of the secondary blazing orange highlights on the red as well here.
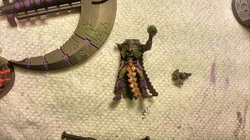
Working on the upper half of the lord now. Ran into an issue with his head...I couldn't get it to sit right. I ended up magnetizing his head to his torso...which turned out to be an excellent idea, as later I found out he no longer fit on the barge...
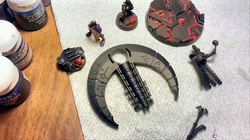
Some more in progress shots.
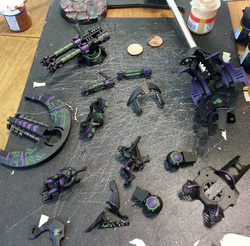
Taking a break from the lord, I went back to the barge. The various weapons are magnetized, so it can swap back from a command barge, or an annihilation barge. The underslung gun can also be swapped.
I used the web for inspiration on picking which parts to color purple. Kinda of went for a green goblin type theme. Starting to come out pretty well.
Here is mainly base colors, with a few highlights on various sections. I normally try to paint each color across the entire model at one time...but I get feed up with nothing changing sometimes, so cheat and jump ahead.
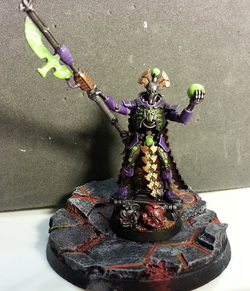
Finished up the lord! He came out great. Lots of detail and time in this guy.
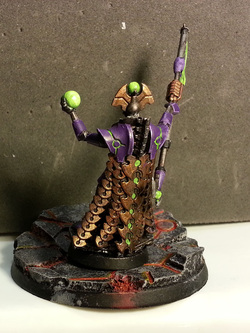
Back shot of the lord. I went back and forth on his head piece. Eventually stuck with the bronze. The orbs and scythe also have a coat of ard coat to give them some gloss and pop a bit.
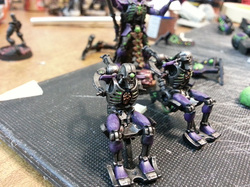
Time to work on the drivers. They go a bit faster then the lord, as there is a lot less detail. Even so, because you can see pretty much 360 degrees of them, they still take some time.
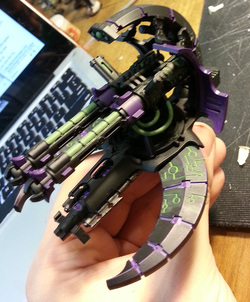
Doing some test fits before final gluing. This is working and looking pretty good!
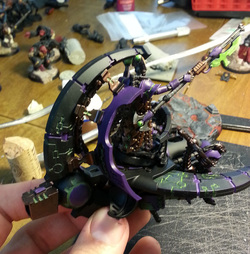
Oh no! The base I made for the lord causes him to not fit in place on the barge. Glad it's good his head happens to be magnetized! Now if he gets stuck, you can just pull of his head, and he easily comes off the barge. Then his head snaps on. Just like ever living protocols!
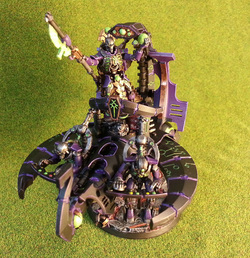
And the barge is finally done! Tons of edge highlighting and work here. Multi-week project for sure!
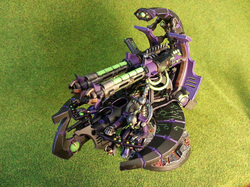
Annihilation mode!
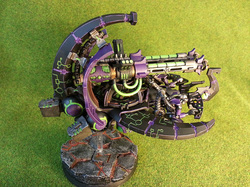
Pretty pleased with the end result. Especially how sturdy it is! (You can really see how thick that dragonforge base is in this shot)
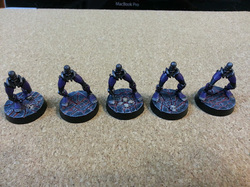
Now back to the immortals! Ten figures to go!
Because the immortals have a really giant confusing and bulky gun, I decided to do the legs and bases separately, then match up the torso's later.
Because the immortals have a really giant confusing and bulky gun, I decided to do the legs and bases separately, then match up the torso's later.
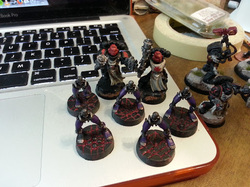
Also started working on my templars when I got bored of painting tiny necrons. I can't imagine painting warriors. I think I'd tear my hair out. Any necron player should try painting an ork nob sometime. It's sooooo much easier!
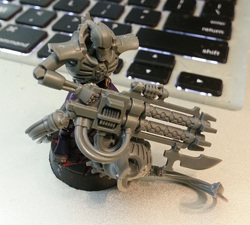
Test fitting the guns and arms. For those that don't know, immortals have a very specific torso to gun assembly. It is a total pita to get lined up and correct. Very frustrating. (Especially if you throw away the directions or mix up which torso goes with which gun!)
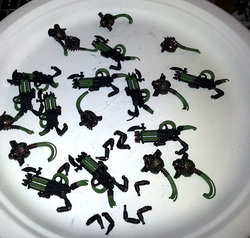
Batch painting at it's finest. Working on an entire squad at once is efficient, but very mind numbing. Make sure to take breaks!
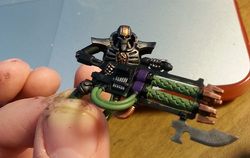
I like to periodically test fit, and check color proportions to make sure things are going together. If not, it's easier to fix earlier on, then when you've got to fix ten models.
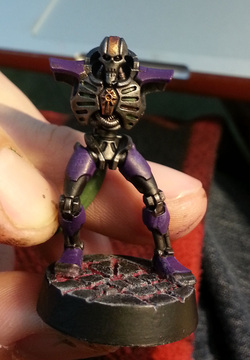
Coming along. You can see how dark the boltgun is when just dry brushed over tinbitz with a coat of badab black. It's bright enough to show some detail, but dark enough to give a different look then a standard boltgun dry brushing.
I also changed the shoulders here, as I felt it needed a bit more purple.
I also changed the shoulders here, as I felt it needed a bit more purple.
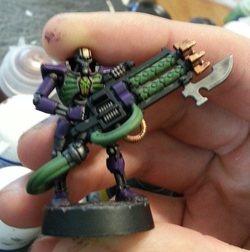
Test fitting again. Lot of highlighting left to do. I also don't like the way the bronze looks on the gun tips.
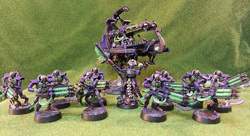
Everything done! This is the finished gift I presented. It took a lot of work, but I felt it was worth it in the end! They look great, and I enjoy removing them from the table every game I play vs him :).
Hope you enjoyed this little free form painting blog. I promise ones in the future will be a bit more organized.
Hope you enjoyed this little free form painting blog. I promise ones in the future will be a bit more organized.
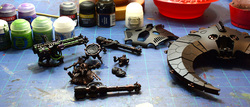
Whats this? Super secret bonus image? That's right! I started working on the night scythe and another necron lord!