THIS IS THE INDEX PAGE. THIS PAGE IS ONLY USE FOR WEEBLY SYSTEM. NO NOT USE THIS PAGE!!!!
PLEASE CHOOSE A DIFFERENT PAGE LAYOUT TO CREATE YOUR WEBSITE
The Making of MEAD: Nice Rack!
Now that your batch of fermented flying insect gold is finished, you need to separate it from the waste. Time to transfer it into smaller containers in order to continue the aging process...and to make drinking it easier!
Now that your batch of fermented flying insect gold is finished, you need to separate it from the waste. Time to transfer it into smaller containers in order to continue the aging process...and to make drinking it easier!
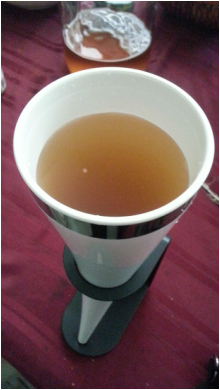
If you look online or ask any real serious, "I'm looking for an award," mead makers, a lot of them will tell you that mead doesn't really hit its stride until it has been aged for a few YEARS. Ain't nobody got time for that! With experience gathered from my last couple of batches, I find that six months is a pretty good turning point in the maturation of a mead. This goes especially for any dry (less sweet, more alcoholic) mead. It had been about four and a half months when I racked (to separate from the main fermentation container) my latest batch. This one is sweeter than my previous batch so it wasn't as much of a necessity to wait the extra month and a half. I had also cracked this one open the week prior for an advance tasting with the rest of the FYN crew - it was delicious!
Step 1: Containers.
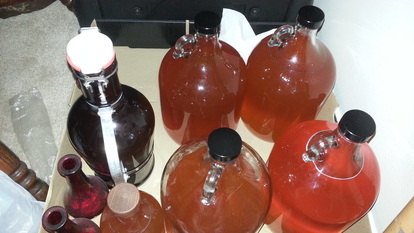
The first thing that you will need is the containers, of course. When I first started brewing I picked up a bunch of the one gallon carboys (seen above) at my local brewing store along with other materials. You can also order them from Amazon . The only problem here is that they are usually more expensive then they need to be (about $10). If you don't mind waiting to finish the contents, you can just go to your local grocery store and pickup these jugs with juice or wine in them for a lot less.
Most of my jugs were empty, except for the last bit of my previous batch (see horn above). I wound up sacrificing my sobriety for the greater good. Once you gather all of you containers together, then next step is to...
Step 2: Sanitize!
If you have never used the containers before you want to take the steps in my previous article , sanitizing in a solution etc. Since I only use these jugs for mead and the alcohol content is pretty decent, I usually just wash them out with dish soap and hot water initially. After all the soap is rinsed out, I put some ethyl alcohol inside of each, screw on the lid and shake them up to make sure that the insides are thoroughly covered. An extra (but quick and easy) step of sanitization never hurts. I let the alcohol sit inside while I finish setting everything else up. When I am ready to use them I just rinse them out until I can't smell anything lingering. Remember: DO NOT USE ISOPROPYL ALCOHOL - IT IS POISON!!!
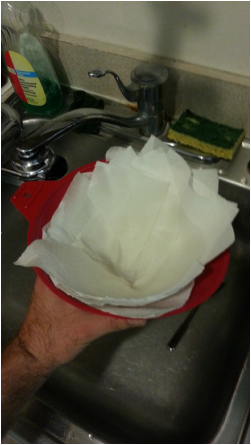
The other pieces of equipment that I use are a funnel and ten layers of paper towel to act as a filter. I Clean the funnel the same way as I clean the containers. For the paper towels, while they are new and "clean," I will usually run some alcohol through them (rinsing clean with water afterwards) just to be safe. *Note: I've tried using a coffee filter in the past, but it just takes way too long to process the liquid. You can buy filters specifically for this purpose but I have no drive to shell out the extra money for them and like the coffee filters, take way too long.
Step 3: Final Setup.
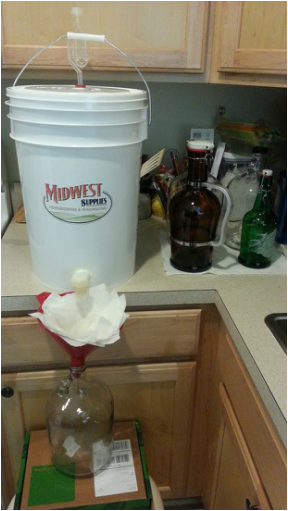
Once you have everything cleaned and ready to go, its time to do your final setup. When racking, I setup right next to my sink just in case there are any spills or additional cleaning is needed. You never know when you might have to toss something into the sink in the case of an emergency.
Keeping it simple, I just used a step stool and small box to get my funneled container to the appropriate height. Once that is done, pop out the airlock and slowly turn open the spigot. In my case, the make-shift cellophane governor I placed on the inside of the spigot worked perfectly to help control the flow. As the filter gets saturated, the mead will begin to flow through.
This is where some patience and experience is required. There is an equilibrium that you can achieve with an equivalent input and output. If you set the flow just so, you can pretty much "set it and forget it." I did this and just watched anime, checking back on the filter ever 10-15 minutes. Just like any filter, the more particulate that it collects, the slower the liquid will pass through. If you leave things for too long, you may get an overflow. I had to replace the filter two or three times over the course of the entire racking process.
Something that can slow down the transfer of liquid even more is a lack of ventilation.
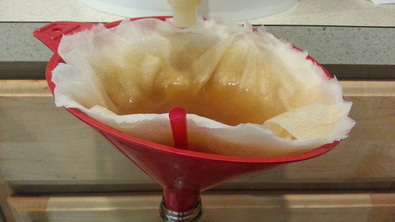
Here is your pro-tip of the day: setup a snorkel. The funnel that I am using fits perfectly into the neck of the jug creating a seal. On top of that, as your filter gets further saturated, it too will prevent air from escaping. There must be an equal exchange of volume otherwise pressure will build up inside the container and slow everything down.
The solution: bendy straws! All you need to do is to stick the bendy end down into the funnel (under the filter) until it gets into the throat the of the container. This will provide ample ventilation and keep things flowing. Be careful when adjusting the filter, the straw can fall into the jug if you are not careful.
As your main fermentation container empties and you near the bottom, you want to err on the side of caution. In every batch of mead you make there will be a portion of which you just have to write off as a sacrifice to the gods. You do NOT want to scrape the bottom of the barrel as this will be saturated with sediment and is just not worth the trouble in the long run.

Step 4: Clearing a.k.a. The Waiting Game.
Even though I used a filter, there is still sediment left in the liquid. The picture to the right is one of the freshly filled jugs minutes after screwing on a cap. Believe it or not, there is actually a can behind this jug. You can add things like gelatin to your mead and "cold crash" it (put it in the fridge). This will help the sediment drop to the bottom of the container a bit faster so you can rack the liquid off a second time. If you don't want to bother with those extra steps, you can just let it sit and do its thing.
Even though I used a filter, there is still sediment left in the liquid. The picture to the right is one of the freshly filled jugs minutes after screwing on a cap. Believe it or not, there is actually a can behind this jug. You can add things like gelatin to your mead and "cold crash" it (put it in the fridge). This will help the sediment drop to the bottom of the container a bit faster so you can rack the liquid off a second time. If you don't want to bother with those extra steps, you can just let it sit and do its thing.

You can actually see the can in this picture. The mead in this jug has been sitting for a little over a week (half full). I usually just let things sit and settle on their own. Also, the only secondary racking that I do is when I pour the mead into smaller bottles for transfer to a friend's house or party. Spare 750ml liquor bottles work great for this. Besides that I just let things sit. Some people say that this can cause a yeasty taste (the sediment is dead or dormant yeast) but I have never really found this to be an issue.
Step 5: Future Enjoyment.
And there you have it! You've made it and now you've contained it. As far as enjoyment, I recommend sweeter mead being chilled or over ice and dry mead at room temperature. Also, a word of advice - start you next batch within a month of racking. This golden drink of gods has a habit of evaporating faster than one might think!