What can I say, the post needed something to grab your attention.

Alright, here's where we are. If you read last week's post, then you'll know that we are preparing for some storytelling via a linked narrative series of games. If you didn't then, now you do.
The set up will be using some old scenarios that I've modified from White Dwarf to place certain forces in specific positions so that the story can advance.
In short, an Ordo Hereticus Inquisitor is attempting to infiltrate forces into dangerous Crime Guild territory to acquire a person of interest known as "Mad Jack". The operation has been ordered so that someone with perceived connections to the still nascent cult "Children of the Dragon". The inquisitor does not have a lot of intel at this point and therefore is collecting facts, observations, and in some cases, individuals to flesh out his picture of what is going on.
So we have good guys (played by Jefe), a person of interest (Mad Jack) and all we were needing were some bad guys to shoot up.
None of us had the type of figures to play with that I was looking for and although I know we could proxy some other figures, in the interest of the narrative, I wanted to have some bad looking bad guys for us to play around with.
As it turned out, I had been collecting those Dark Vengeance cultist figures for a little while because:
a) They are kind of cheap to collect
b) They are nice looking cult figures. I never liked the look of the guys in dresses and pointy hats.
c) They are kind of cheap to collect
So, between my purchases and some other odd acquisitions, I have on the order of 120 of these guys. For our set of games, I only needed around 30 or so for the Kill Team missions and a few more for the Combat Command (yeah, go ahead and turn on your "way back" machine) 400 pt battles.
Then there was the fact that I won't play with unpainted figures.
So I needed to paint up a bunch of guys quickly, ensure that the process could be duplicated because Lord knows, I've got another 80-90 more to paint, and I wanted them to look reasonable. Not great necessarily (NO you won't see them entered in a Crystal Brush contest), but decent enough for what I wanted to accomplish in the game, which was have nice looking good guys running up against dingy looking raggedly bad guys.
Therefore I settled on a technique that I've used before that I call Speed Drybrush Painting. The essence behind this technique is to quickly get a small palette of colors on a lot of figures, recognizing that individually, they won't look amazing, but in a horde they'll actually look kind of intimidating. Also, since they are just minions (of the non-Yellow variety), they are just there to fill a gap visually.
First I needed to pick the palette of colors I was looking for. I wanted dingy. I wanted a ragged look. Since the setting will be urban, I could have either gone with a grey or brown palette. I ended up going with a brown palette, so that the figures would stand out just a tad from what would most likely be a lot of grey, dark buildings.
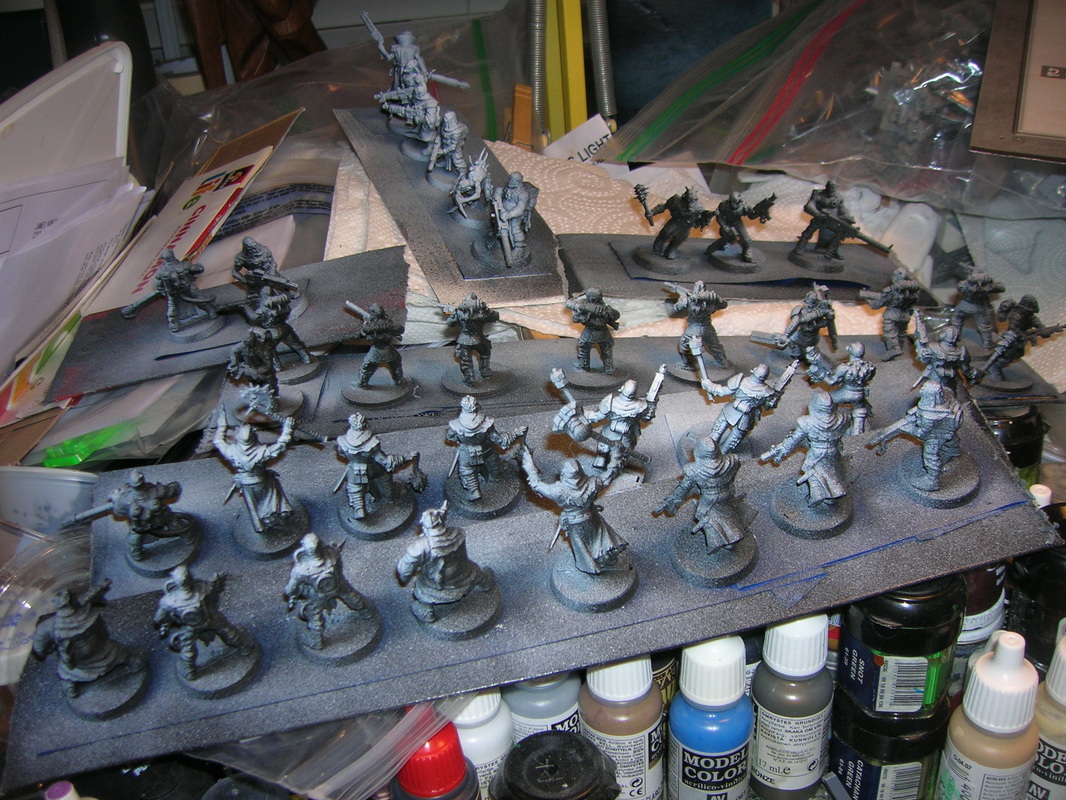
Step 1 Primer
After cleaning up the figures, which didn't take too long, I primered with black and then used a flat white to apply some zenithal highlighting. I did this so that there was some predefined highlights on the figures that the rest of the colors could lay on top of. This is done quickly and without a lot of thought. The goal is to be consistent with the application. In my case, the highlights come from the upper right when the figure is facing you. As color is applied, I will be consistent with how the colors go on, so that in general, there is more color on the right side of the figure and less on the left.
After cleaning up the figures, which didn't take too long, I primered with black and then used a flat white to apply some zenithal highlighting. I did this so that there was some predefined highlights on the figures that the rest of the colors could lay on top of. This is done quickly and without a lot of thought. The goal is to be consistent with the application. In my case, the highlights come from the upper right when the figure is facing you. As color is applied, I will be consistent with how the colors go on, so that in general, there is more color on the right side of the figure and less on the left.
Step 2 A Tad of Color
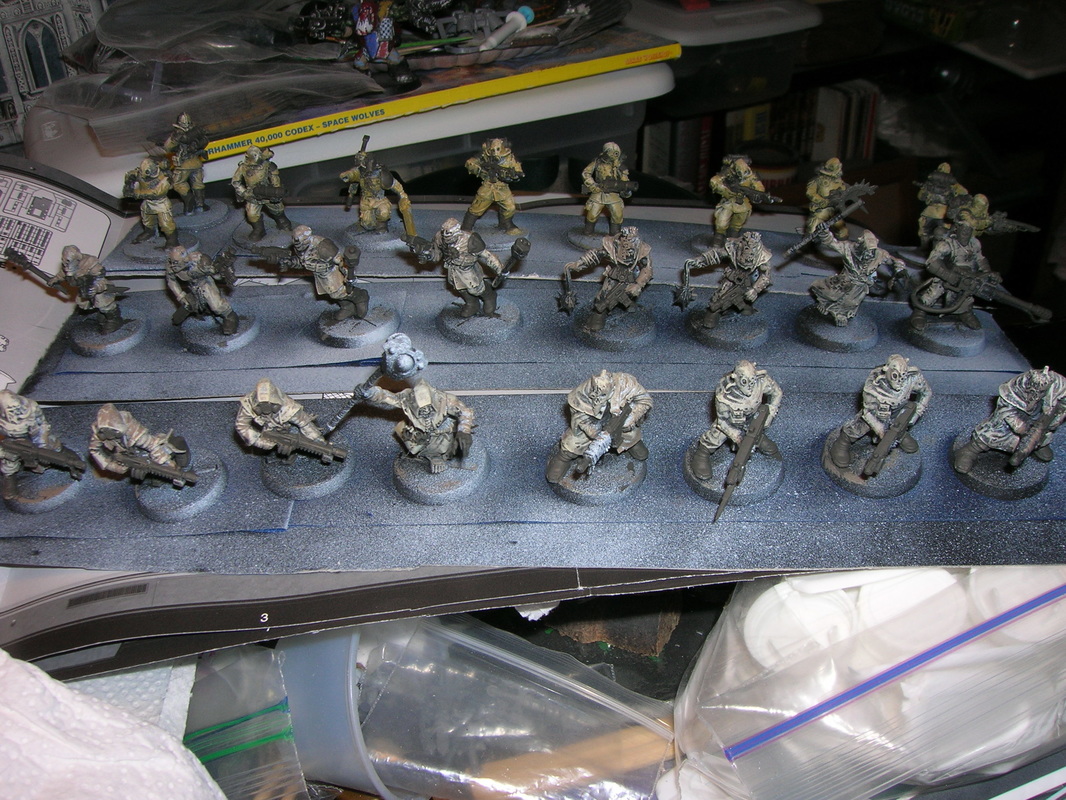
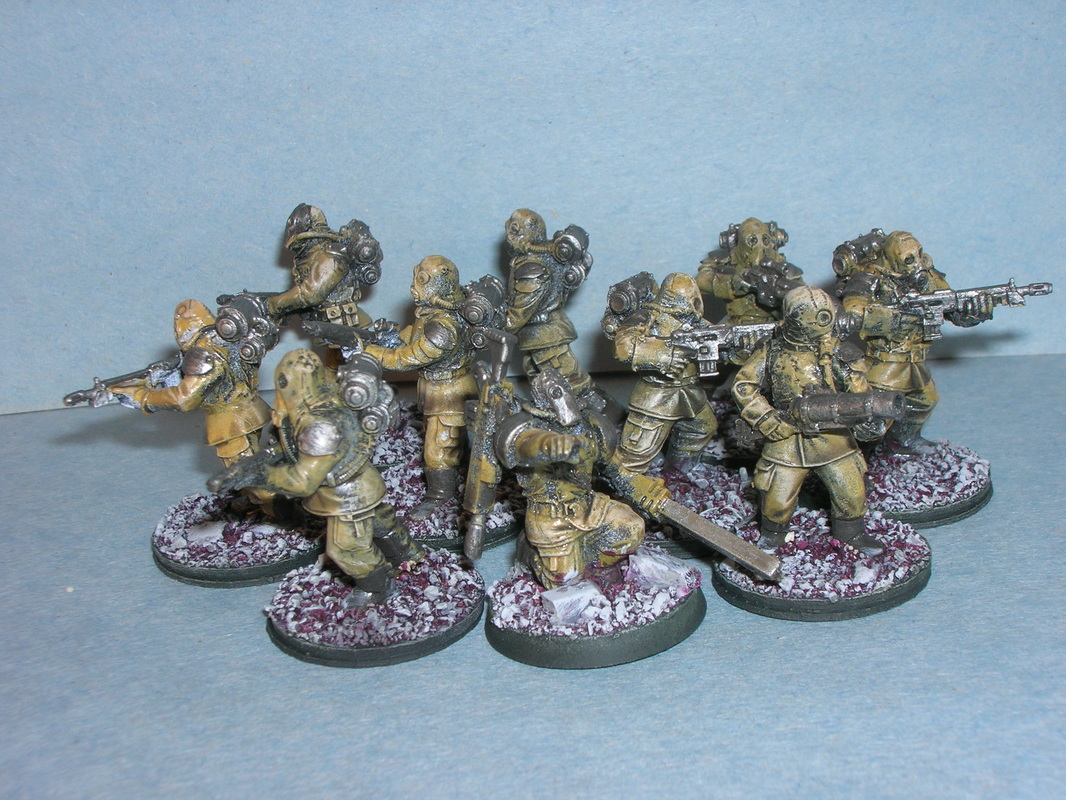
Next up is some color. In this case I found some browns that I wanted and not only drybrushed the base colors, but then added some lighter tones (also drybrushed). This is done very quickly and without a concern about whether or not the application is a little sloppy. Right now, you're just after speed, so color all over, followed by a darker color on the boots.
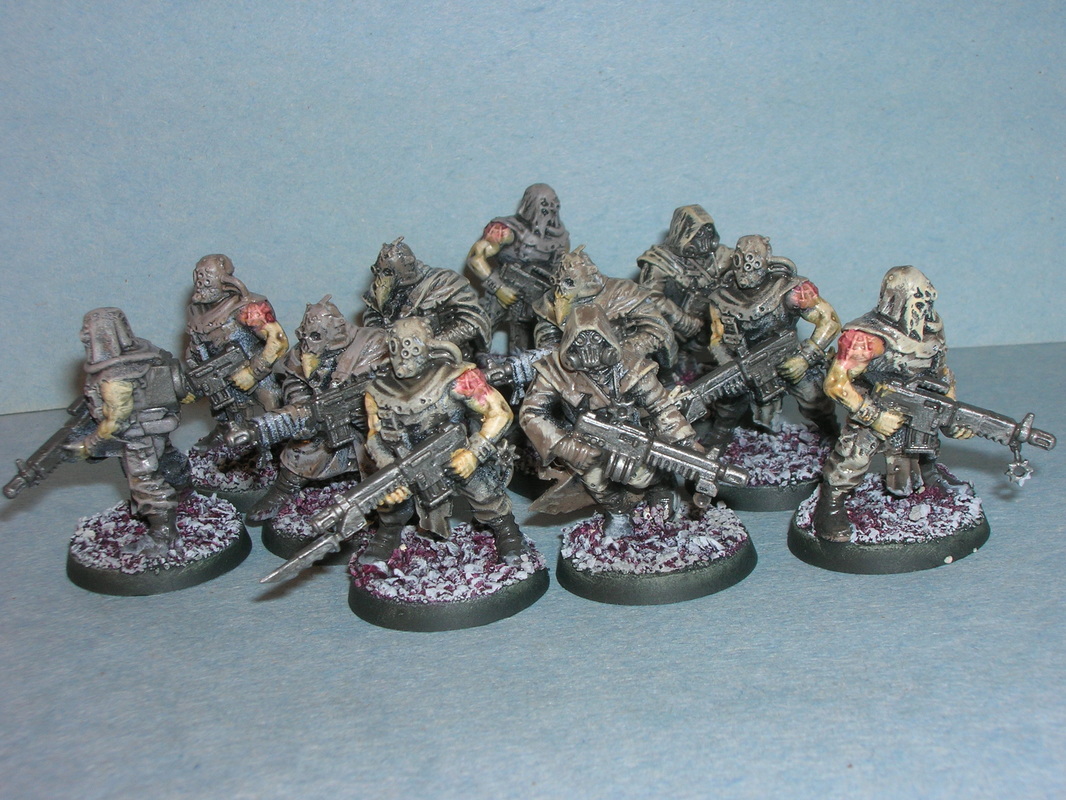
Also note that in the background, I used a different color on that squad. I wanted them to look like a former militia unit, so something different. Same technique though.
It looks pretty rough. That's Ok, there's a step for that too.
Step 2 A Tad of Color
Next up is some color. In this case I found some browns that I wanted and not only drybrushed the base colors, but then added some lighter tones (also drybrushed). This is done very quickly and without a concern about whether or not the application is a little sloppy. Right now, you're just after speed, so color all over, followed by a darker color on the boots.
Also note that in the background, I used a different color on that squad. I wanted them to look like a former militia unit, so something different. Same technique though.
It looks pretty rough. That's Ok, there's a step for that too.
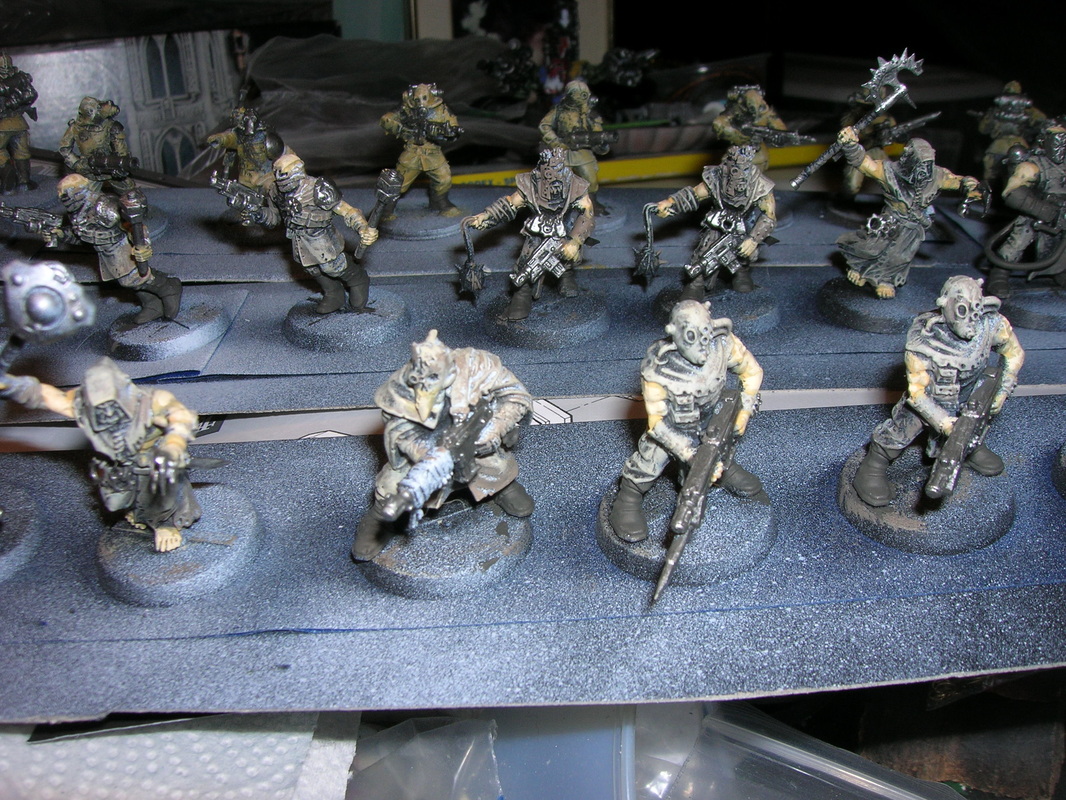
Step 3 A Little more Color
Now I've applied some flesh colors on the figs. Again, this is all drybrushing, I just used a smaller brush for this (also Reason #34 on why cheap brushes you can trash are good to have). Note that the skin tones don't cover all the flesh areas and that they mostly hit the highlights.
That's Ok.
This is all about fast and easy.
Step 4 Let's take a Dip
No, I am not referring to swimming or that nasty stuff some people stick in their mouths. I'm talking Future's Floor Finish (FFF). This is really great stuff because:
a) It's really cheap
b) It does a great job of smoothing out all the drybrushing you've done
c) It's really cheap
d) Did I mention that this is a very cost effective technique?
Now, I thought I had taken a picture of the post dipping stage, but that event seems to have eluded my camera.
The gist of this step is to mix up a batch (like baby food jar size) of dip. This can be any color or tone that you want. I opted for a grey-ish brown as I wanted dingy and ragged. The key is to get it dark enough to provide some shadow, but not so dark as to drown out your colors.
So how do you do that?
Easy, Watson, you experiment. Remember it is much easier to add more darkness then it is to lighten something when using this technique. So what do you use to make the colored dip? Inks, washes, paint all work. There's no real science to this, just add a few drops of color, mix it up, then apply it on a figure and see if that's what you want.
Then let the figure dry.
Now, does it look good enough to you? Then go ahead and apply the dip by brush to the rest of your figures, otherwise add a little more color and repeat.
Also, don't dip them in the dip. That wastes a lot of your secret concoction and creates a mess. So, just brush it on and let it dry. Once you've finished up this step, go clean your brush with soap and water, otherwise when the brush dries, you will have just created a paint brush statue.
At this point, all you have to do is base up your figs and then seal. The reason is that FFF dries very shiny, which is fine if that's want you want, but I didn't, so some Testor's Lustreless spray later and I have a decent amount of figures finished in around 4-5 hours.
Now to the finished product.
Leadership Team (Featuring Billy Idol)
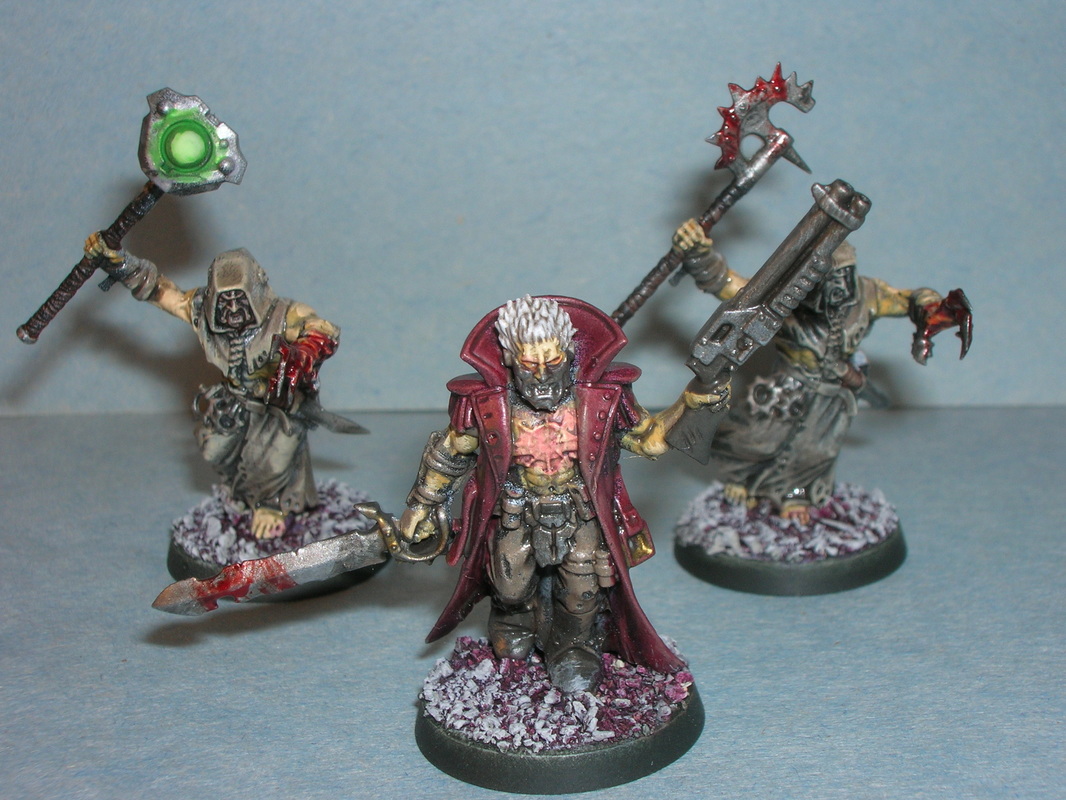
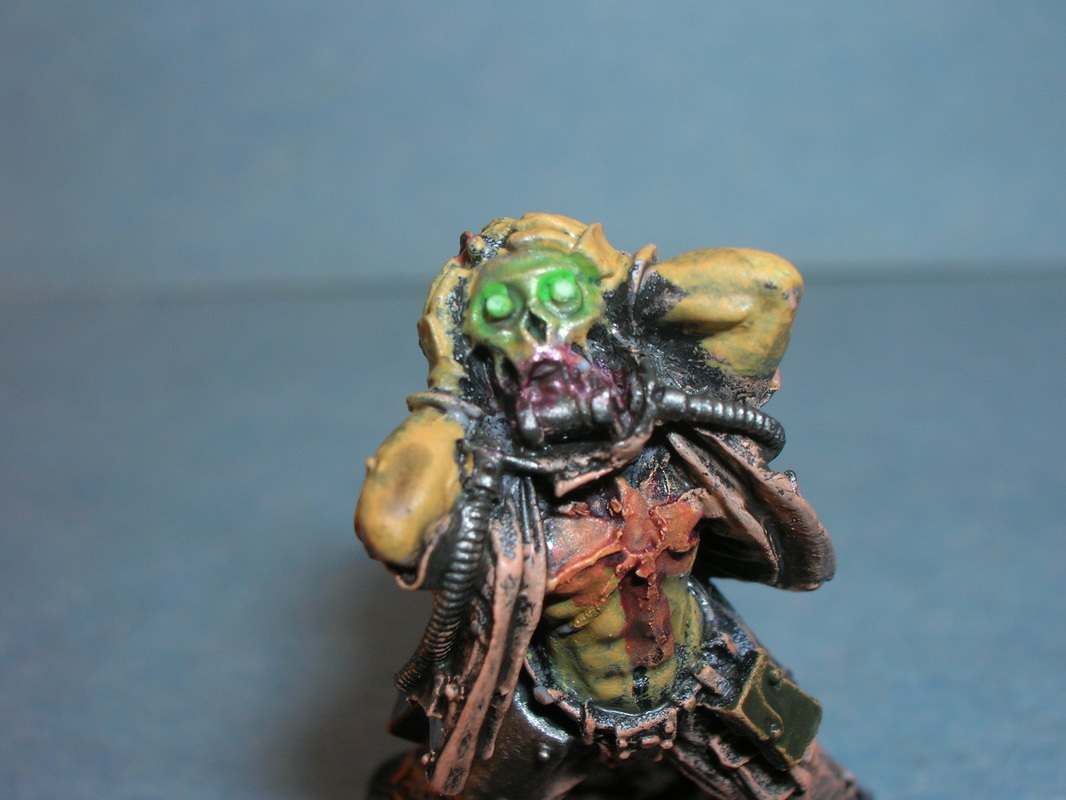
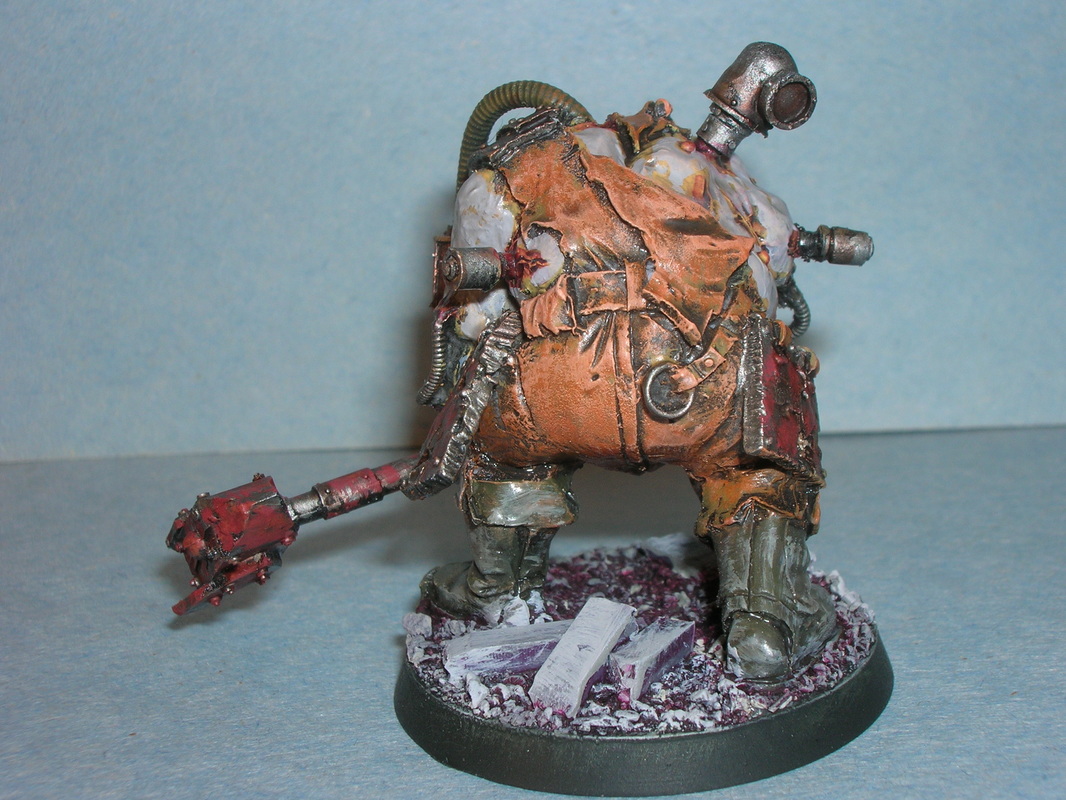
Mad Jack

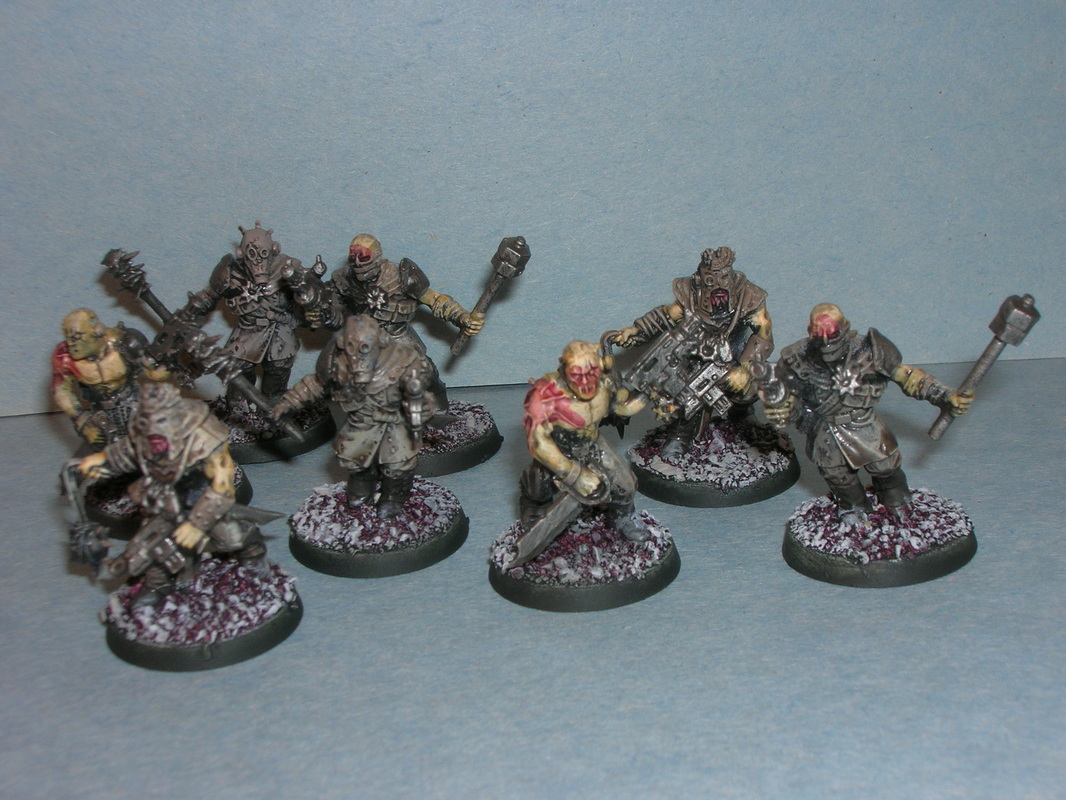
Cultists

Gork and Mork
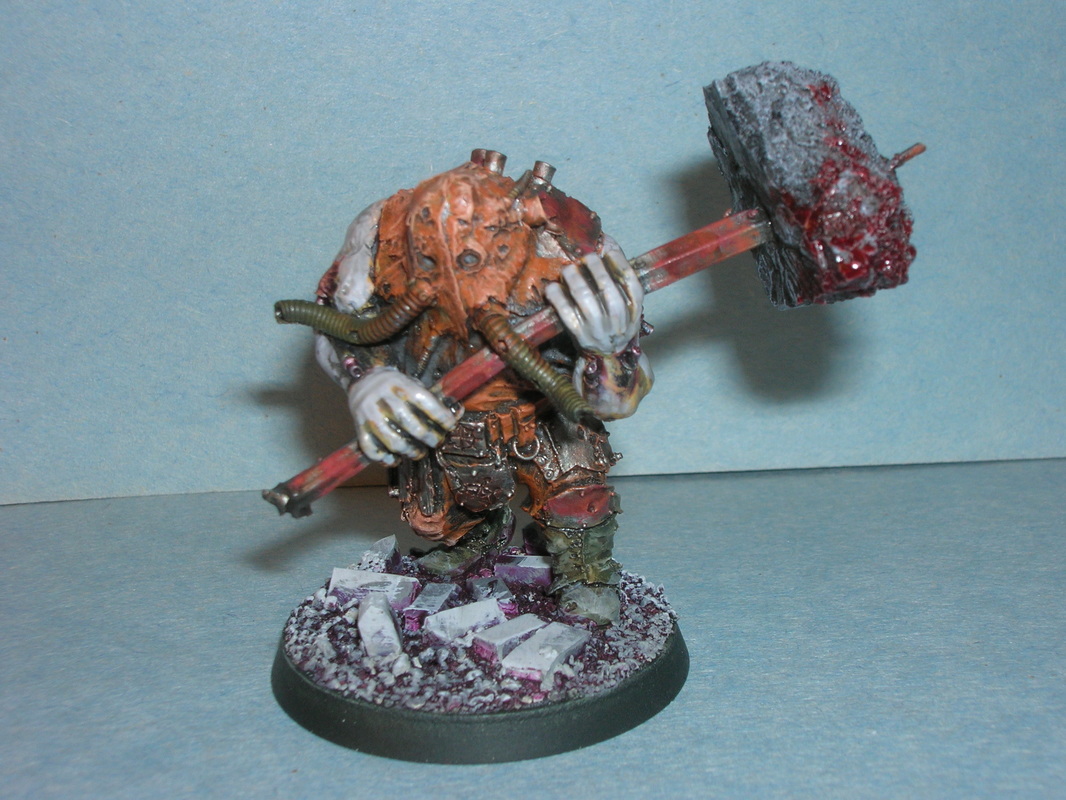
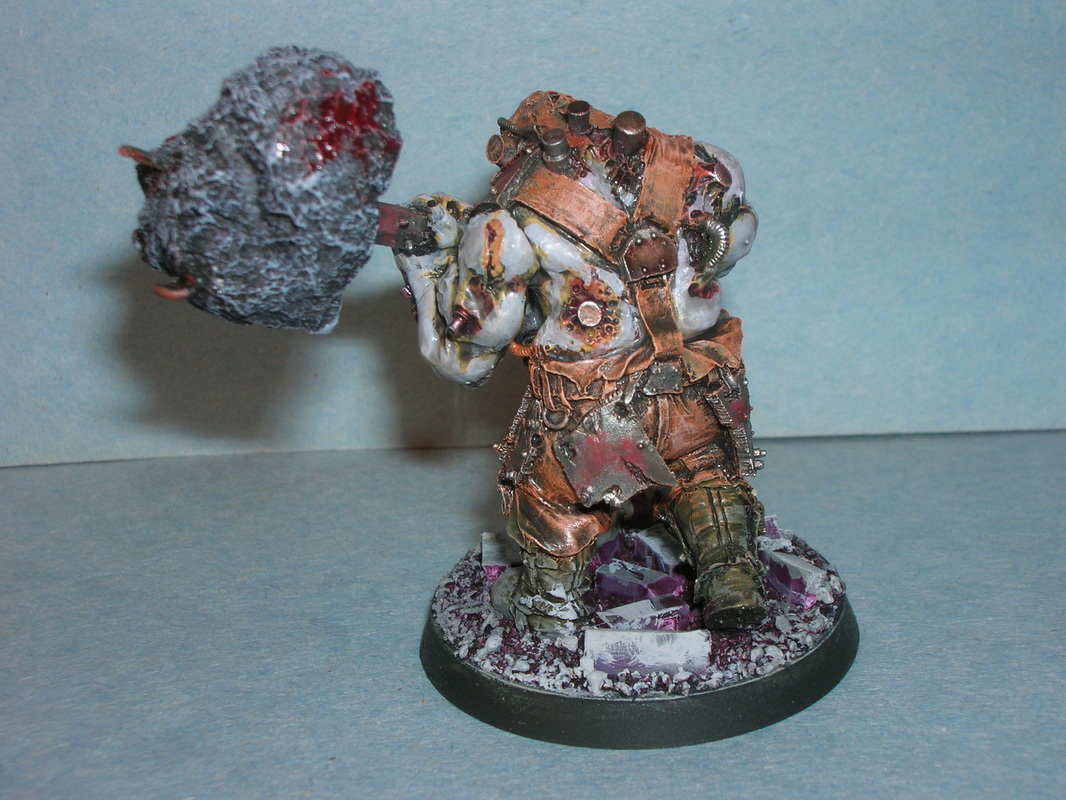
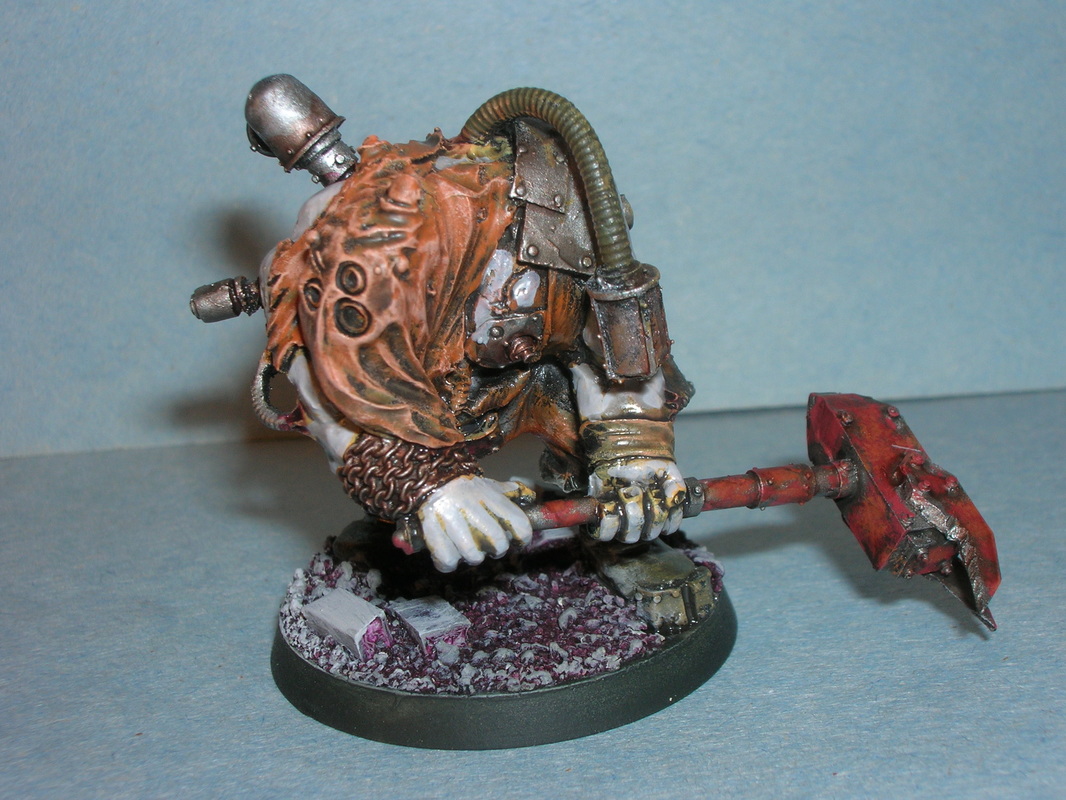
Originally, I had painted the Ogres with the same flesh tones as the cultists, but there just wasn't enough visual space between the flesh and the cloth they were wearing, so I came up with a lighter grey that I applied over most of the skin, then reapplied dip to smooth things out a little bit.
The army list I'll be using is Siege of Vraks Pt. I because [reasons}. I know, it's out of date. It was "in" of date at one point and for the purposes of what we need to get done, it's close enough. It's also what I have.
So the stage is set. We'll be playing these games at Mo's Grimdark Emporium of Really Wet Terrain (i.e. terrain boards painted up to look like a miniature Blade Runner set). There will be some other interesting things going on that I'll report on later.
I think that's it for now, see you in a week.
Cheers,
+++
"What am I looking at Captain?"
"Perhaps one of the rarest...elements in the galaxy"
"It looks...metallic"
"Indeed it is"
"Yet it moves, as if it is..."
"I believe the word you are looking for is living"
[silence]
"Where did this come from?"
"The system is known as Persephone. Using your galactic positioning system it is known as..."
[interrupts] "Yes, I am aware of its location, your ship's navigation data banks were...interrogated when you entered port. Who else knows you are here?"
"No one. I assumed that you would prefer that I remain discrete...for the Greater Good"
"In that, you would be correct"
[looks up and nods]
In one smooth motion, the Kroot beast unfolded itself from the shadowed ceiling beams, grabbing the surprised human, and hauling his body into the air. The tall thin figure sitting at the table stepped back as an inconvenient stream of fluid began to rain down upon the table, accompanied by a painful gurgling sound.
Connecting to the ship's bridge via an implanted comm link, the figure noted the opened voice line icon on his retinal display.
"I want you to prepare your ship for immediate departure. Also, please ensure that the Gue'la ship that we have been tracking encounters an accident and that there are no survivors."
+++


 RSS Feed